My grandmother always kept a two-piece concrete bird bath in her front yard, I remember moving it in/out of the garage, painting it in spring, cleaning it, and filling it for her many times.
When I bought my first house my dad gave me a one-piece plastic heated bird bath that I kept running for a while, but when I moved to my current house the bath apparently didn’t make it.
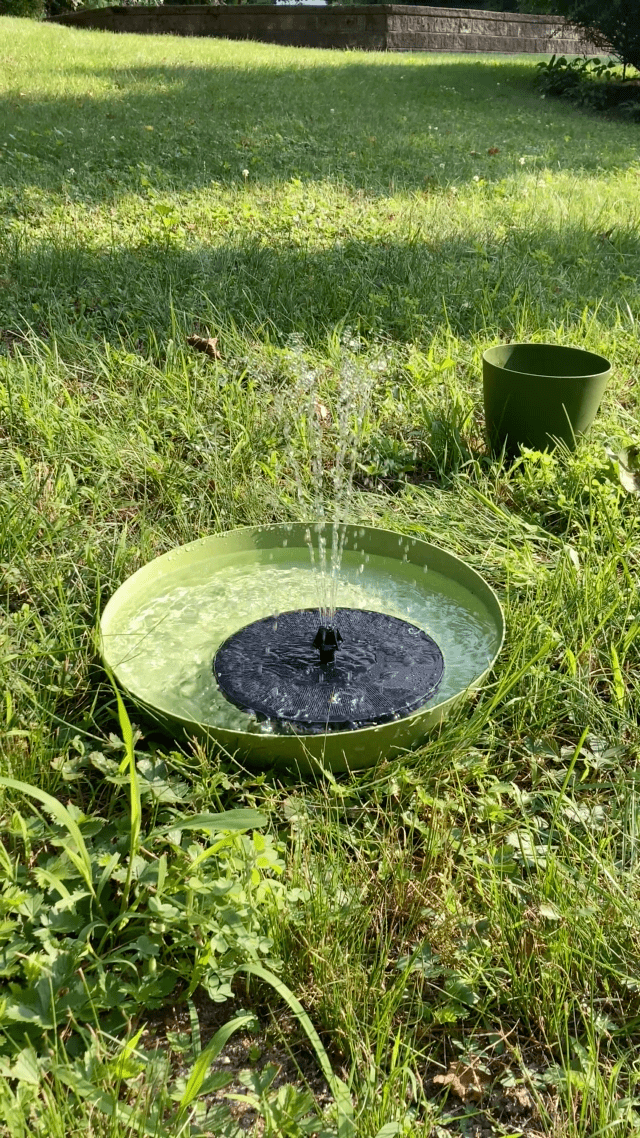
I bought a heated bath this past winter, but it didn’t come with a stand, and the dish was very shallow, so it was really a pain to use, I decided it might be OK for winter, but for the warmer months I really wanted a concrete birth bath like I remembered from my grandmother’s house — and after all the unusually hot days we’ve been having I decided to put a solar pump in it to attract birds to it and keep the water moving.
I generally like to avoid Amazon as my first stop for shopping, so I hit Home Depot’s iOS app where I found a nice “light weight concrete” two piece bird bath, it looked OK and was well reviewed, so I went with that… I searched for solar pumps and found that they really only had one, and it seemed a bit expensive, but I ordered it anyway for sake of convenience.
The pump arrived first and I decided to try it out in a flower pot overflow dish… I filled the dish, dropped in the all-in-one solar pump and……nothing.
At first I though it was DOA, but then after a brief moment of direct sun appeared I realized it does work, but only when the sun is really blasting directly on it…
I quickly realized that something better for my local birds was needed, so I went to Amazon’s app and was surprised to see a huge range of similar looking all-in-one pumps under $15…
At this point I knew I wanted to do a comparison of a few versions from Amazon vs. the Home Depot pump…
All GIFs below were taken back-to-back to avoid any unfairness as a result of shifting sunlight. It was a fairly bright day at about 4PM so the sun was a slight angle vs. the location.
First up is the one from Home Depot, “AquaNura LP Solar Birdbath Kit” — At $42.98 it is by far the most expensive in this group, in fact it cost more than the three other pumps combined:
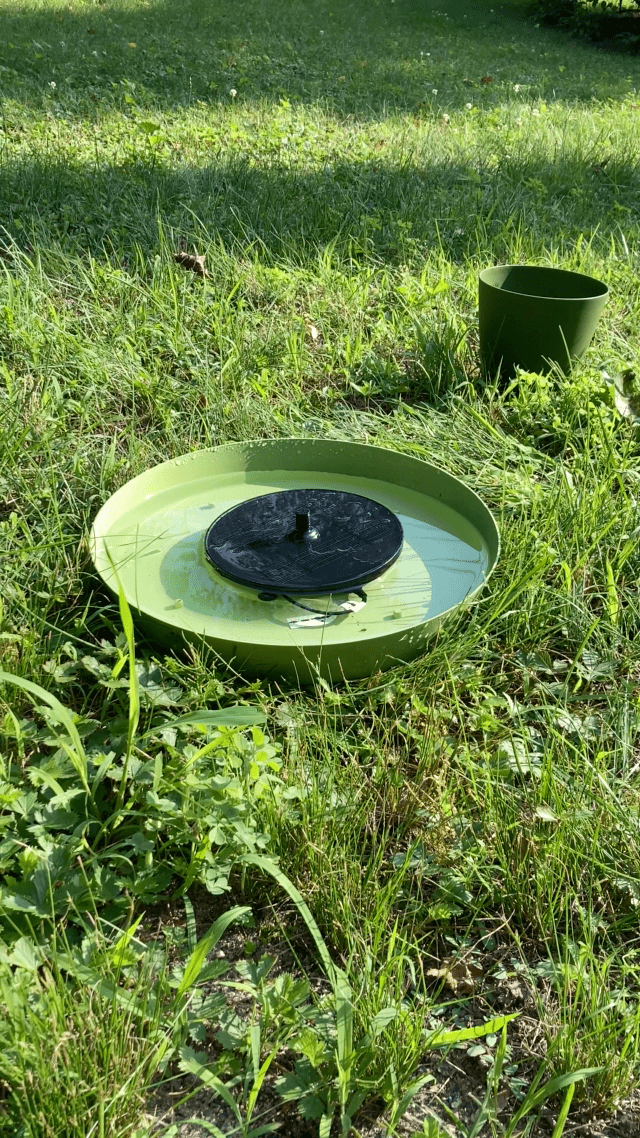
Does that AquaNura look dead? That’s because it essentially is… it needed absolutely full, direct, fade-your-fabrics-in-an-hour, sunlight to start pumping… any sort of angles between the sun and panels, or cloudy haze, and it would just go inert, or dribble. It does have suction cups on the bottom which will help hold it in place (assuming your bath has a smooth & flat surface… if it’s a dish or rough then the suction cups won’t do anything)
I absolutely do not recommend this thing, and it will be going back to Home Depot for a refund.
Next we have the three semi-random choices from Amazon… I say semi-random because it’s incredibly easy to get overwhelmed by choices at Amazon, so these three represent some of the lowest cost versions that were available w/ Prime shipping and didn’t have a very off putting title or name.
First up in the Amazon group is the “Solar Water Fountain for Bird Bath” — $7.99 with a 10% off coupon so it was $7.19 or so… it’s the least expensive of the bunch:
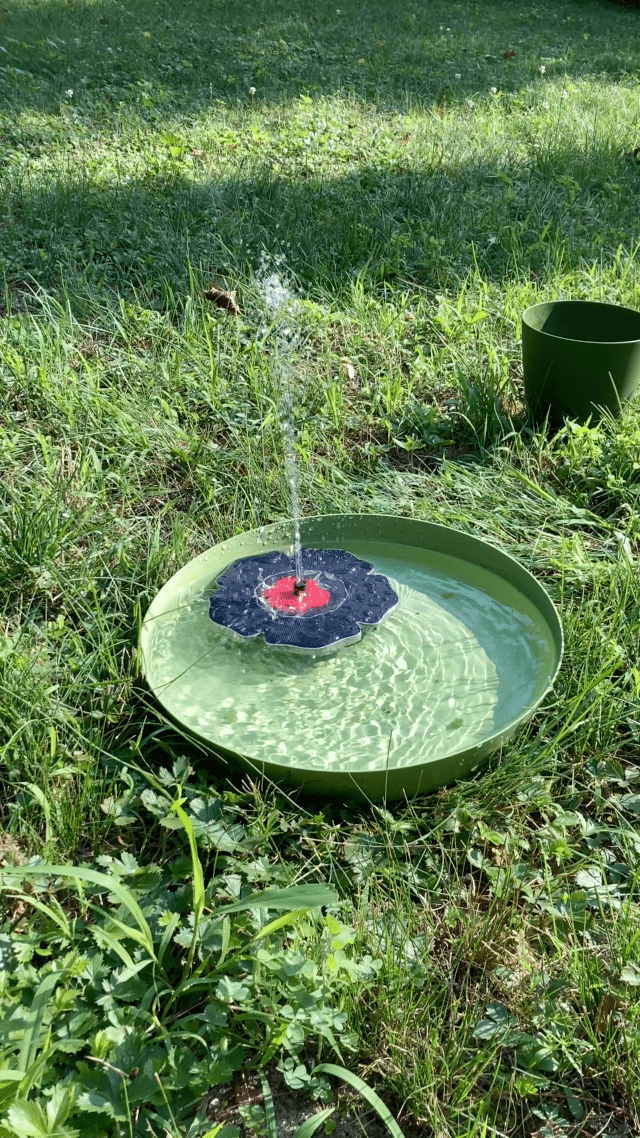
Wow, yeah, so that’s a pretty huge difference vs the AquaNura in the same basic light… and it’s got that weird rose in the middle which really classes up the joint and attracts more upscale birds. It doesn’t have anything to hold it in place, and in fact it’s on a foam block so that it will float — I guess people put these in their pools and ponds — that’s less ideal in a bird bath where you want the thing to stay stationary in the center.
Next up is the “Jutai Solar Bird Bath Fountain” — $22.99 it seemed expensive, but Amazon had a 50% “coupon” so it was $11.50:
I’ll say here that all of these pumps come with a variety of nozzles, but I think the spray nozzle option on this one produced a nicer spray and it seemed to have double the number of solar cells as well (at least visually, who knows if they are just fakes). This also has a foam bottom so that it will float around.
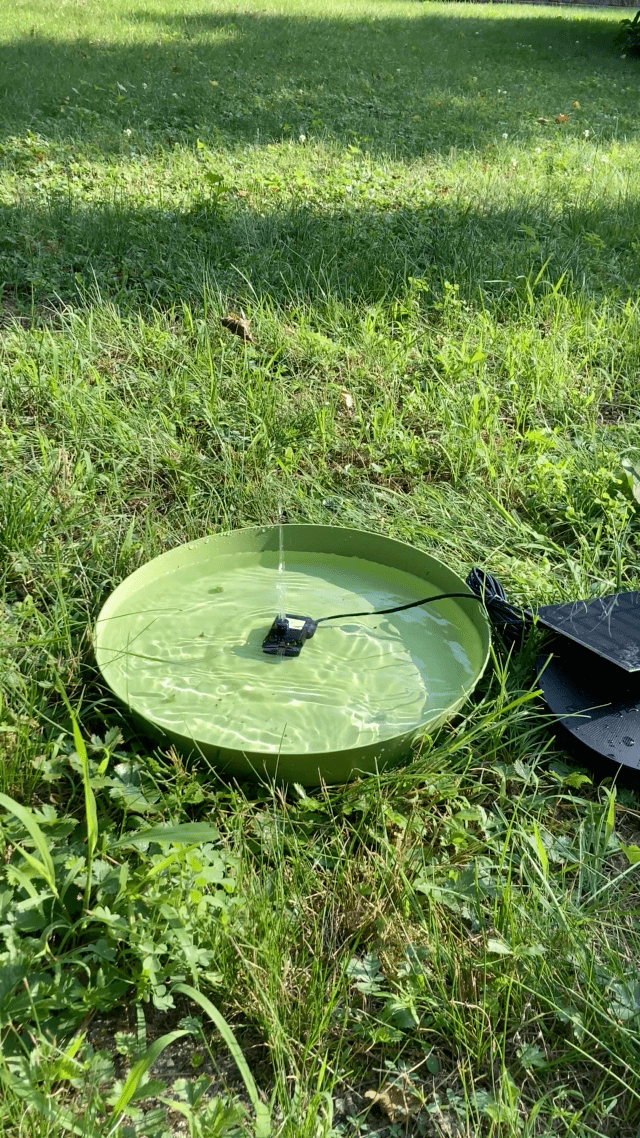
Last in the Amazon line up is the “Sunlitec Solar Fountain with Panel” — $9.99 with no “coupon”, it’s also the only model that had an external solar panel…
I thought the squirting was sort of interesting, it went on for a while so I assumed it was by design, but after a few minutes it became a steady stream, so I guess maybe air in the pump at first…
I like several things about the external panel —
- External panel can be oriented much more ideally vs. the built in panels, and allows the bath to even potentially be in the shade a bit
- This panel has more solar cells than any of the built-in versions, so it will likely work in less ideal light conditions
- The entire contraption displaces the least amount of water in the bird bath which leaves more water
- The pump has suction cups so it will stay in place on a smooth surface, but even in concrete it will likely stay in place as there is no foam to float it around.
On the negative side —
- External panel means wiring is kicking around…
- Panel has no mounting features or stand, so it just sort of sits on the ground
- The bare pump sitting in the bird bath isn’t aesthetically appealing at all
Overall conclusion:
“AquaNura” from Home Depot is an absolute rip off at nearly $43 even before you consider the fact that it’s the worst performing pump in this group.
You can’t really go wrong w/ any of the $8-12 pumps I got from Amazon:
“Solar Water Fountain” is the cheapest in the group at under $8 and performed very well
“Jutai” is my choice for an all-in-one because it seemed to have more panels and the nozzles had nicer spray pattern
“Sunlitec” is a good choice if you want to remote mount your panel or you’re using a very small dish for the bath and need to avoid displacing water.
Final Thought:
In all cases you want to consider your bath diameter because these things will empty your bath in short order if the sprayed water isn’t landing completely back in the dish… and in general they will greatly accelerate evaporation anyway, so plan to refill the bath every morning, or potentially even more frequently.


